Monday, November 10, 2014

Insulation :)

When purchasing or building a home a lot of people don't pay attention to one of the most important things: insulation. If we don't see it, it doesn't mean that it's not important. After inspecting our home, we noticed the roof insulation was very thin and in bad shape. Also, our HVAC unit was located in the attic, above the insulation, which means that we were cooling and heating outside air. This is very bad for your power / gas bill. The HVAC unit should ALWAYS be located in a conditioned space.

On all the homes we design, we always specify to use spray foam insulation between the roof rafters. The spray foam not only provides the R-Value required by Code but also seals any gap and/or opening where air might infiltrate.

There are a few companies in Atlanta that install spray foam in your attic: they vacuum your existing insulation (with all the debris), disinfect the attic and spray a minimum 6" of foam to the underside of the roof decking.

See below our attic.


Kitchen / Dining Room

The wall between the kitchen and the dining made both rooms to feel small and dark. The pocket door was not sufficient to connect the (2) rooms together.

We demolished the existing wall and created a larger kitchen/dining room. 

When removing existing walls, it is VERY important to consult a professional!!! Luckily for us, Tony is a junior structural engineer and I've been working on existing older home renovations for the last 7 years, which allows me to evaluate and calculate existing and new necessary structure. 

Unfortunately, since no renovation goes on smoothly, when we removed the kitchen/ dining wall we discovered there were two existing (3) 2x 10 built-up beams resting on the wall top plate about 2' from the west wall. There wasn't even a built- up post to support these beams. Fortunately, right below the beams, in the floor structure, there was a 6x 10 beam spanning all the way to the north exterior wall. We calculated, and the 6x 10 beam and a new 4x4 post was sufficient to support the (2) built-up beams and carry the load from the built-up beam to the to the beam below.

See below a few images before the demolition, during, the new post and the almost complete opening.


BEFORE - View from the dining towards the kitchen

BEFORE - View from the kitchen towards the dining room

DURING

DURING


DURING -  View from the dining room towards the kitchen

DURING - Post installed

Post top
Post base


Closet 3

A few weeks ago I explained our solution to obtain a larger master walk-in closet: http://anarchitectandanengineerbuyahouse.blogspot.com/2014/10/closet-2.html


The sheetrock and floor are now complete: please see below a couple of images with the framed pocket door and the finished closet.

Pocket door into the closet

View in the closet

Wood Flooring

When we bought the house, the entire 3rd floor (bedrooms level) was covered in a "beautiful" blue carpet. I have nothing agains area rugs, but carpets I just don't understand. The amount of dust, bugs and dirt they collect always scares me.

Our budget might be low, but removing the existing carpet and installing wood flooring was a priority.

Selecting wood flooring for your house it's a very important decisions: durability and beauty has to be equally important. We researched and compared engineered, laminated and hardwood and discovered the hardwoods are the best choice. A prefinished, engineered or laminated flooring will be harder to maintain or to match the finish in the future.

We selected white oak flooring grade 2 (we love the nots and imperfections). To stain it we used Minwax Natural Color and to finish it: Bova. I strongly recommend using a water based finish product (like Bova) to finish your floors. An oil based finish can off-gas for up to a year.

Please see below some images during installation and with the final product.

Work in progress
Master Bedroom


Corridor
Master Bedroom & Closet

Finished product


Enlarged finished woof floor

Friday, October 10, 2014

"Job" site visit

Exciting day at the house today. Can't wait to share with you when it's all complete.

sneak peek :)

Tuesday, October 7, 2014

Closet 2

I've been very busy lately and I didn't have time to post, but a lot of things happened on the house so I will try to share them with you today and tomorrow. Tony has been working quite a lot on the house and most of the demo and build-out is DONE! Thank you for all our amazing friends that stopped by to help us.

I will start with the walk-in closet. As you remember last week, I posted about the existing 2' wide closet in the Master bedroom. Obviously, that didn't work, so we tore it down and enlarged the size of the Master bedroom.

Demolished closet
The Master Bedroom was now 14' x 20', too large for us. A bedroom is suppose to be cosy and comfortable. We intend to locate the bed where the existing closet was, so we can have beautiful views of the park every morning we wake up.  On the North side of the bedroom, there was now a large area with no windows or obtrusions (see in the picture below).

"dead space"
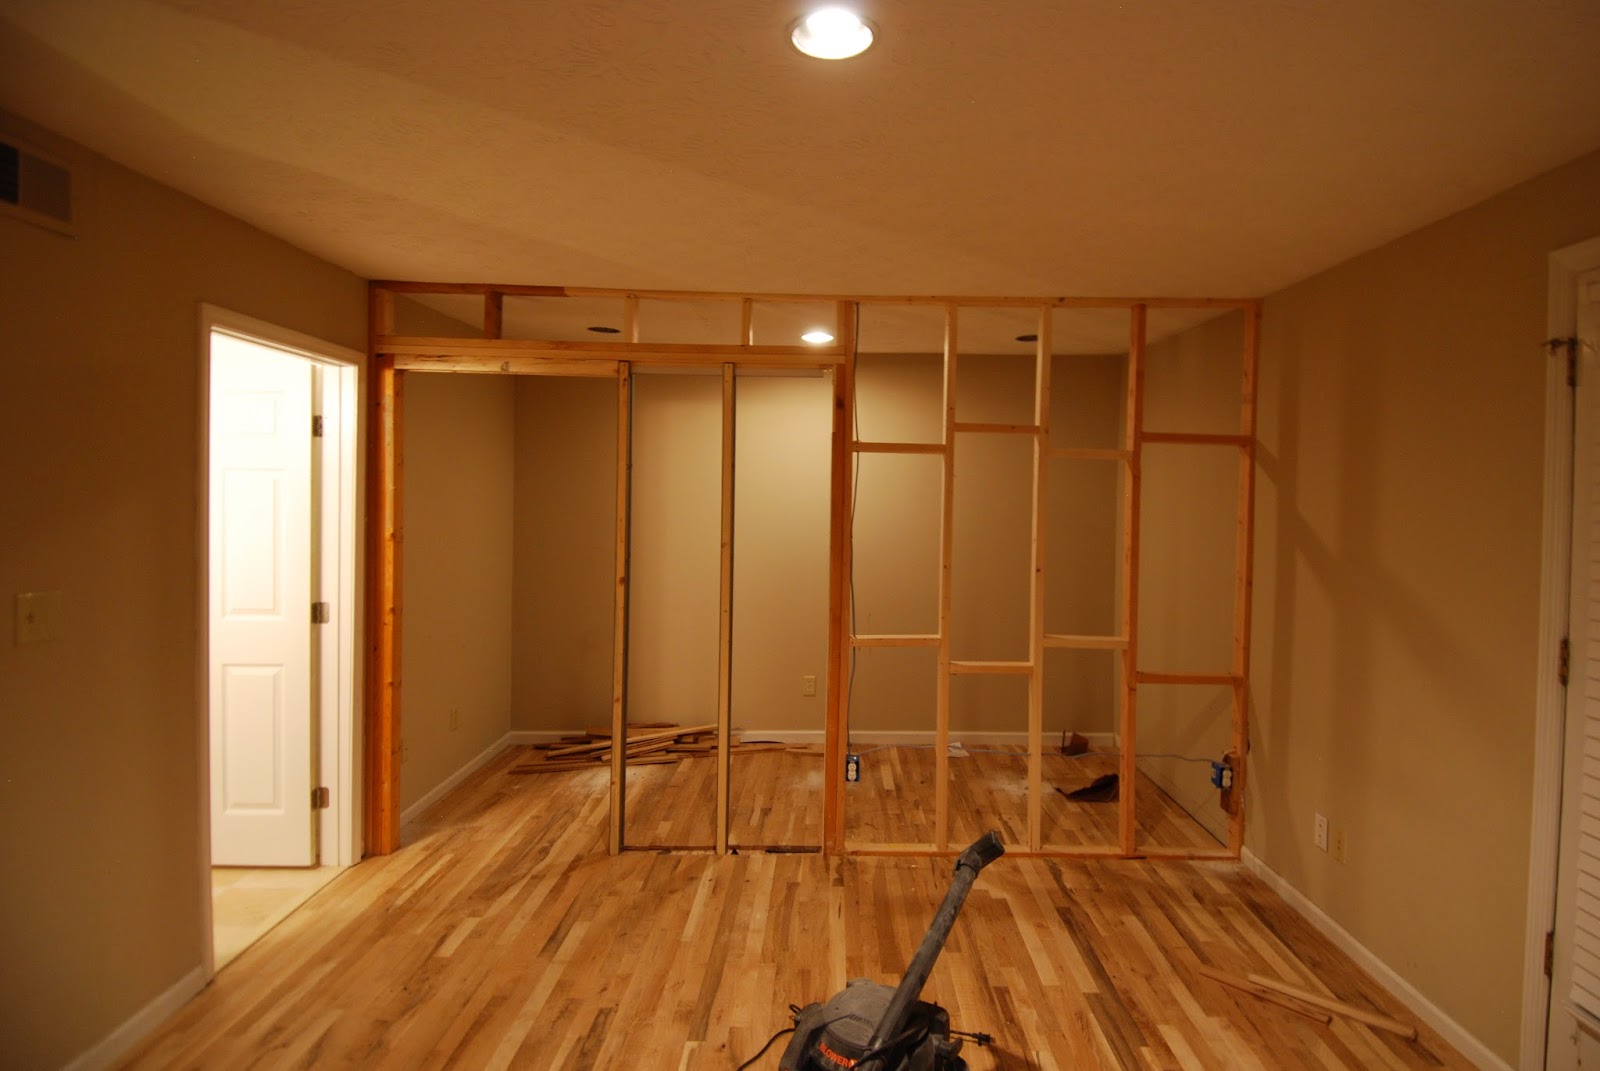
In this area, Tony and our dear friend Ionel, framed a new wall with a pocket door, and created a 5' wide room. The pocket door frame used is Johnson Hardware 1500 Series, easy to install,and very durable.

The Master Bedroom is still large at 14 x 14' - 7 1/2" but now we also have a large 5x 14' walk-in closet. Happy girl!

Walk-in closet in progress


Wednesday, October 1, 2014

Closet 1

Our future home had a very small 2' wide closet in the master bedroom. That was not acceptable!


First step, demolish the existing closet wall. Tony did an amazing job tonight. He took out the folding door, sheetrock, framing and now we have a larger open master bedroom.


Stay tuned to see how we will change the layout of the Master Bedroom and build a large walk-in-closet :)


Sunday, September 28, 2014

Stairs

One of the features we love about our house are the see-through stairs: it opens the dining room to the living room, and to the rest of the house.

Stairs before
But we hated the carpet. We thought the reason the carpet wrapped around the treads was because it hid beneath just plywood. There goes our surprise when we removed it from the first steps and we uncovered beautiful wood treads.

Stair during

We removed the carpet from all the steps and it's unbelievable how open the space looks now. We will sand and finish the treads in the coming weeks.


The stair at night
The stair during the day

Saturday, September 27, 2014

Work day

Because "everything starts with a break", we are enjoying our morning coffee on our new deck. We'll post later about the projects we are taking on today: a lot of demo....


Wednesday, September 24, 2014

First project

First project: Opening the garage.

The previous owner built a wall to hide the overhead door from the inside, demolished the wall between the garage and the corridor, and separated the garage into (2) spaces: a reception area and a storage room.

Before 
Tony working hard under Bebe's supervision
After a hard day of work


We (and by "we" I mean Tony) demolished the interior walls this past weekend. We will install a new overhead garage door and build a wall to separate the garage from the corridor on the ground level.


Design phase

The excitement you feel when you step into your home for the first time it’s overwhelming. We like this house as we did the first time we saw it and we know it's the perfect home for us.

House numbers and purple walls

Tony and I are very anxious to start working on our future home. We have (2) months before the due date (move date), and we would like to finish as many project as possible until then. Both of us have full time jobs (very busy at work ) so we will have to do most of the work over the weekends. As we tackle each space we will share before, during and after pictures. We will have to hire a few professionals along the way (electrician, plumber, etc), but most of the work will be done by us (AKA Tony) and, hopefully, our friends :)

We started the design process long before we close on the house